Hier könnt ihr Euch zum Online Kurs anmelden, weitere Bücher und DVDs bestellen und euren Bedarf an Clickern aufstocken.
Anmeldung zum Online Kurs

Mit der Anmeldung erhältst du 1 Jahr Zugang zum Online Kurs und zur Community, welche die Teilnehmer des deutschen und des englischen Kurses zusammenbringt. Ebenfalls enthalten ist eine individuelle Coaching session. Im Anschluss sicherst du dir deinen Zugang zum Kurs und zur Community im monatlichen Abo für € 2,99 das du jederzeit kündigen oder pausieren kannst (oder jährlich € 35). Dadurch bleibt auch dein Lernfortschritt im Kurs erhalten, damit du direkt dort weitermachen kannst, wo du aufgehört hast. Falls du keine Verlängerung möchtest, kannst du jederzeit vor Ablauf der 12 Monate das Abo beenden.
Eine Ratenzahlung ist ebenfalls möglich in drei Raten a € 120. Beachte hierbei, dass am Ende der 12 Monate der Zugang endet. Falls du weiter Zugang haben möchtest, gibt es die Möglichkeit eines Abonnements. Um deinen Lernfortschritt nicht zu verlieren, solltest du das Abo kaufen, bevor die 12 Monate enden.
Um dich zum Kurs anzumelden, klicke auf "Jetzt anmelden". Dies leitet dich auf die Bezahlseite von Elopage, welche den Kurs hostet. Dort kannst du unter verschiedenen Zahlungsmethoden auswählen.

Einzelstunde Coaching (ohne Online Kurs)
Falls du nicht im Online Kurs eingeschrieben bist aber Hilfe beim Training wünscht, dann buche eine Einzelstunde Online Coaching. Das Coaching erfolgt über eine Videoanalyse, d.h. du sendest ein kurzes Trainingsvideo (ca. 5 Minuten) und bekommst detailliertes Feedback in Form eines Video und danach Besprechung über Videocall, Telefon oder Email.
50,00 €
Gesamtpreis
Bücher und DVDs (Englisch)
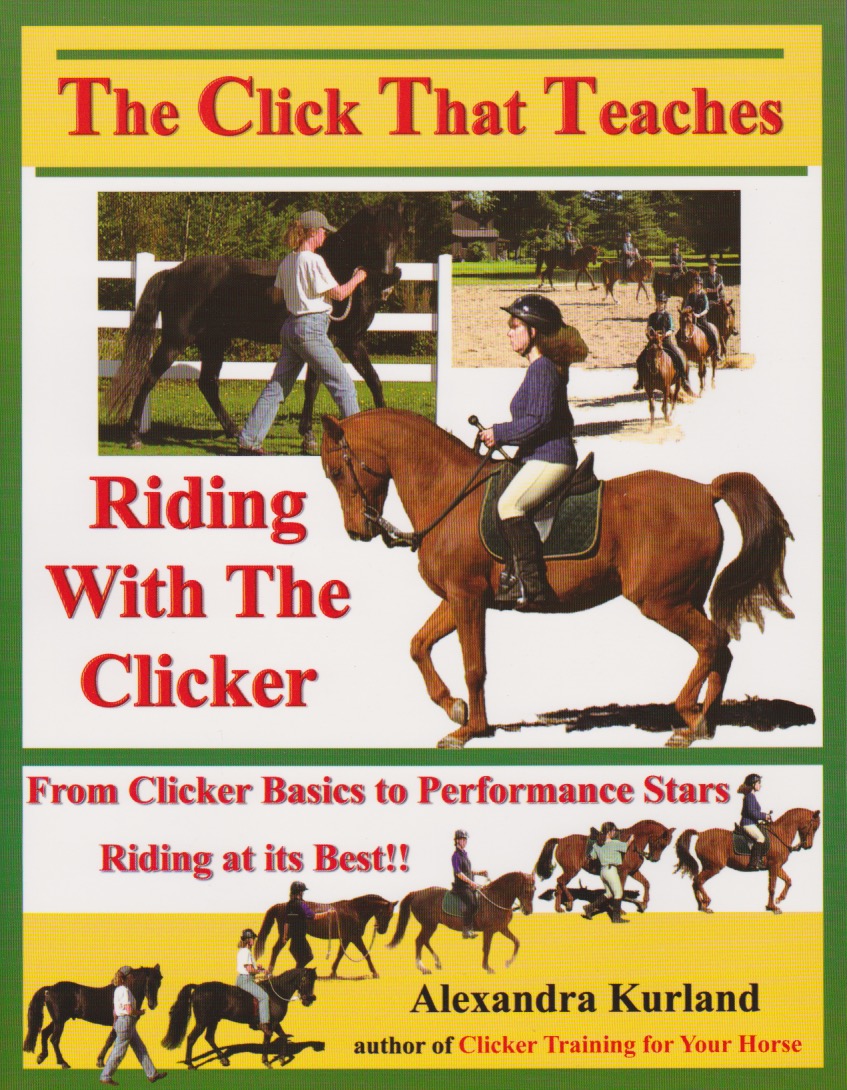
The-Click-That-Teaches Series
Alexandra Kurland hat eine Reihe an Büchern und DVDs veröffentlicht, die sie selbst produziert und verkauft. Der Versand aus USA ist recht teuer, insbesondere für Bücher, und dazu kommen noch Zollgebühren. Deshalb sind die Bücher und DVDs in Europa auch über Alexandras The-Click-That-Teaches Coaches erhältlich. Alle Bücher und DVDs sind auf Englisch!
Hinweis zu den Versandkosten:
Die Versandpreise gelten für Europa, da der Versand aus Italien erfolgt. Ich verschicke generell mit Einschreiben, damit die Pakete eine Trackingnummer haben. Es gibt etwas günstigere Tarife ohne Tracking, die etwas länger dauern (bis zu 2 Wochen). Falls ihr diesen günstigeren Tarif bevorzugt, dann gebt mir bitte vorher Bescheid.
Bücher von Alexandra Kurland

The Click That Teaches: A Step-By-Step Guide In Pictures
"The Click That Teaches: A Step-By-Step Guide in Pictures" is packed with over 600 photos. This comprehensive training guide will take you from clicker basics to advanced training. Even if you are a novice handler, you’ll find these step-by-step lessons easy to follow. And for the experienced clicker trainer, you will enjoy finding the “clickable" moment in the training sequences. Develop your timing, develop your eye with these step-by-step lessons.
The book covers:
Clicker Basics: Getting started with the Clicker
The Three Foundation Lessons of a Clicker-Trained Horse: Targeting,
Backing and Head Lowering
Ground Manners
Accepting Shots, Clippers and Other Practical Skills
Trick Training
Advanced Leading Lessons for Safety and Performance
Riding with the Clicker
Plus:
Creating a Safe Horse: Alternatives to Punishment
Super Clicking: The Principles of Training and the Pre-Ride Checklist
A Horse’s Bill of Rights
Training tips and Terms
Alexandra's recommendation:
"Both Clicker Training for your Horse and the Step-By-Step Guide in Pictures will get you off to a great start. Clicker Training for your Horse gives you lots of great stories in addition to straight forward lesson plans. The Step By Step book gives you an organized lesson plan that you can follow systematically or dip in and out of following your horse's needs. With so many photos it's almost like "reading" a video. Most of the photos were pulled from video so I could show you the precise moment of the click and other important details. It's an easy book to use, and the lessons will take you from clicker basics to the beginning of performance work. When you have built a solid foundation with this book, you'll be ready to move on the the next book in the series: The Click That Teaches: Riding with the Clicker.
I'm also frequently asked which someone should get: the book or a DVD. The books and the DVDs are designed to be used together. The books give you the whole picture: the whole road map. The DVDs look at a particular slice of the work. So when you are ready to work on head lowering, for example, the books will all show you were it fits in to the overall foundation work, and they will give you instructions on how to teach it, but for in-depth details you'll want to go to the Lesson Three: Head Lowering DVD."
32,00 €
Endpreis, zzgl. Versandkosten
- 0,54 kg
- nur noch begrenzte Anzahl vorhanden
- 5 - 8 Tage Lieferzeit
The Click That Teaches: Riding with the Clicker
"The Click That Teaches: Riding with the Clicker" is a comprehensive training guide will take you from clicker basics to advanced performance. The book is divided into Six Sections:
Part 1 Clicker Basics: This section introduces you to the scientific principles behind clicker training. It shows you how to develop polite ground manners and emotional self-control in your horse.
Part 2 Before You Ride: This section shows you how to start a young horse under saddle. This is more than a nuts and bolts section. You'll see how training works in the real world - how training problems emerge and clicker training solutions are found. Training a horse is not a matter of following "cook book" recipes. The best trainers are creative and responsive to the needs of each individual horse. You'll learn how to use clicker training to prepare a youngster for riding - how to teach him the emotional self-control and physical balance he'll need to be a great riding horse.
Part 3 Riding with the Clicker: Riding with the clicker is very much like taking apart a jig saw puzzle and then putting it back together again. You're taking apart your horse's training piece by piece. Only instead of reassembling the original picture, you'll be building it back better and stronger than it was before.
Safety, safety, safety - Safety always comes first. This section introduces you to the mechanics of single rein riding. It gives you two powerful exercises - head lowering and flipping the hips - to stop bolting, bucking, spooking and rearing - in other words, to stop all the major behavior problems that take the fun out of riding.
Part 4 Training Exercises for the Rider: Riding Excellence is built on a foundation of body awareness. These simple exercises allow you to become a "Centaur", exploring your horse's balance through the "t'ai chi walk".
Part 5 Single-Rein Riding and the Building Blocks of Excellence: The previous sections showed you how to take apart your horse's training, to make sure each of the critical responses was working well. In this section you'll begin to reassemble the pieces through a series of patterned exercises.
Lessons covered include: the "why would you leave me?" game, jaw flexions, three-flip-three: the foundation of lateral work, move-counter move, hip-shoulder-shoulder to create collected stops, collected gaits, the "300 peck pigeon" lesson under saddle, the "hotwalker" lesson to build perfect circles, the school figures: rollbacks, half turns, half-turns-in-reverse, diagonals and reverse-arc circles - the foundation lessons for upper-level performance.
Part 6 Riding for Performance: This final section shows you how to connect all the training steps to create an upper-level performance horse.
Alexandra's recommendation:
"When I'm asked which book someone should get, I recommend that people begin with the other two books and moving into the riding book. It will give you a review of clicker basics, but I am very much making the assumption that you have worked through the lessons presented in the previous books and the foundation lesson DVDS. That is the preparation you'll need to get the most value from the riding book.
And speaking of value, I know many of you may be concerned about the price. The Riding book was ten years in the making and it is packed from cover to cover. This is a book you will read many times, and each time you revisit it, you will discover things you did not see before. It truly is a book in which you'll be wondering how I managed to download so much fresh material into your hard copy!
Clicker training breaks every lesson down into small steps. That's its great strength. Riding with the clicker is no exception. This book teases apart what we all thought were the beginning steps of riding and shows you a whole new layer. What emerges first is riding safety. You'll learn how to manage all those issues that take the fun out of being around horses: behaviors such as rearing, spooking, bucking. The same lessons that help you manage the reactive horse, perfected take to advanced performance. And the beauty of this process is you are always learning just one small step at a time. So you may have all the "I'm just a . . . " thoughts: "I'm just a beginner, I could never learn that; "I'm just a trail rider, I could never do that"; etc.. But break the riding process down into enough small steps, and you'll be amazed at what you and your horse will be able to do together."
53,00 €
Endpreis, zzgl. Versandkosten
- 0,8 kg
- verfügbar
- 5 - 8 Tage Lieferzeit
DVDs von Alexandra Kurland
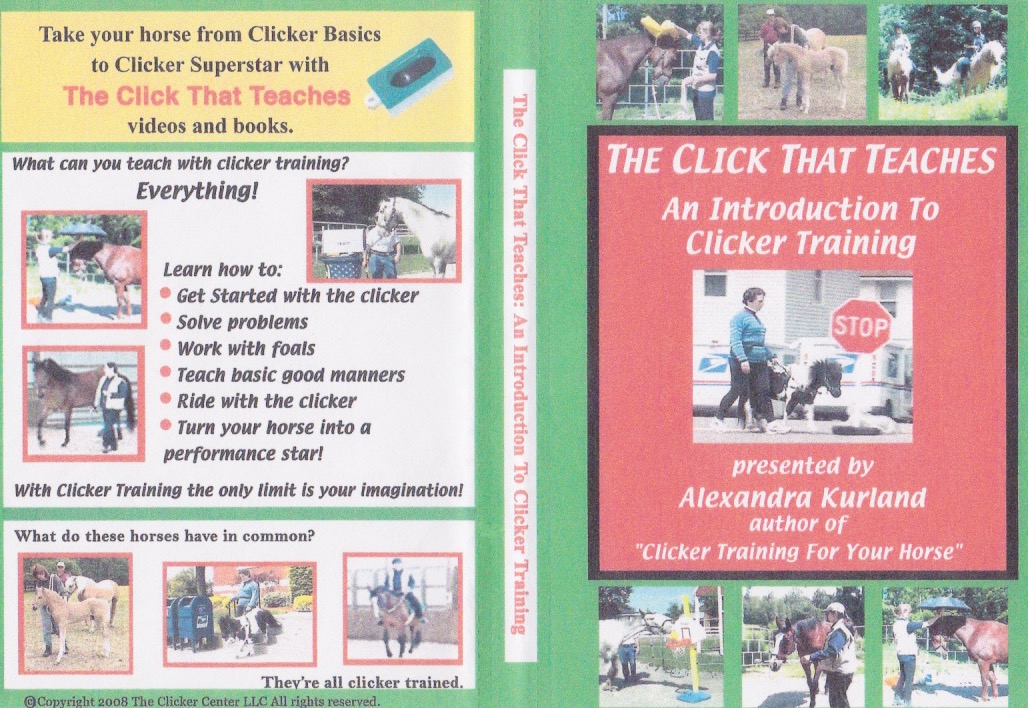
An Introduction to Clicker training
This one hour video is a superb introduction to clicker training. In addition to showing you how to introduce your own horse to the clicker, this video shows you how to use the clicker to:
* Work with young foals
* Accept clippers
* Handle aggressive horses
* Safely encounter spooky objects out on the trail
* Work with fearful, timid horses
* Teach great tricks
All this plus the video introduces you to Panda as she is in training to be a guide for the blind.
Alexandras recommendation:
"People often skip the Introduction to Clicker Training DVD. They skip ahead into Lesson 1 thinking the two videos cover the same material. While it is true both DVDs show video of horses having their first clicker sessions, the DVDs do not overlap in their content. I made the Introduction to Clicker Training DVD to give people an overall look at clicker training and to show them all the practical, every day handling applications that it has.
Every time I go back and review this DVD I am reminded about all the great video that is on it. It's a great DVD to accompany the Step-By-Step Guide in Pictures. Many of the practical applications are illustrated in this DVD, and I do not return to them in the lesson series.
You'll see how to help horses overcome their fear of clippers and other scary objects. You'll see how to combine advance and retreat handling techniques with the clicker to work with young foals and fearful horses. You'll see how to use the clicker out on the trail, especially when you encounter scary "goblins". You'll see some fun tricks. And you'll see how to work with aggressive horses. You'll also see some great footage of Panda's early training as she learns the skills she'll need to be a guide for the blind.
I know budgets can be tight, but my recommendation would be to include this DVD in your clicker library."
22,00 €
Endpreis, zzgl. Versandkosten
- 0,15 kg
- nur noch begrenzte Anzahl vorhanden
- 5 - 8 Tage Lieferzeit
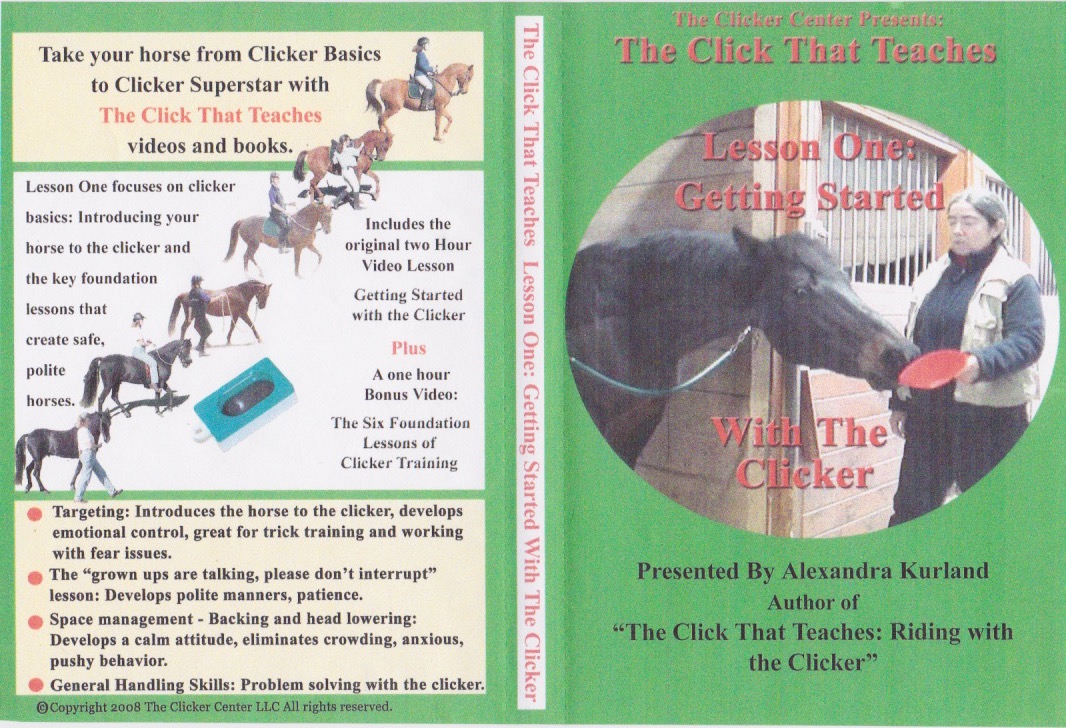
Lesson 1: Getting started with the Clicker
43,00 €
Endpreis, zzgl. Versandkosten
- 0,15 kg
- nur noch begrenzte Anzahl vorhanden
- 5 - 8 Tage Lieferzeit

Lesson 2: Ground manners
In the booklet, “Getting Started, Clicker Training for Horses?, I describe three exercises, targeting, head lowering, and backing, which are the basic building blocks that I teach to all clicker-trained horses.
Targeting introduces the horse to the basic concept of the clicker: behavior leads to click, click leads to rewards. Touch a cone, and all of a sudden your human turns into a giant vending machine! Targeting is the main focus of the first video.
Backing expands the clicker concept for the horse, and helps put an end to mugging behavior. Nudging you is not the way to unlock the “vending machine?. Yielding to pressure and moving away from you is. That means that built into the foundation of clicker training is respect of space. You must have that for safety. You also need it for upper-level performance work. This is the focus of Lesson 2: Ground Manners.
Head lowering is the third important building block because it creates trust and relaxation. This is the mental state in which your horse is going to do his best learning. This is the focus of Lesson 3: Head Lowering: Your Calm-Down Cue.
Lesson 2 begins with a discussion of negative reinforcement: what it is and what role it plays in horse training in general, and clicker training in particular. The video shows you how to take the horse training skills you already know and combine them with clicker training. That’s one of the great strengths of clicker training: it piggy backs so well onto other training methods. You don’t have to throw away everything you have already learned about horse training. You take the best of what you know and combine it with clicker training to make it even better.
Clicker training makes use of two powerful training shortcuts. The first is targeting. The second is negative reinforcement, or more simply put, pressure and release of pressure. This later is something that all horse training, no matter how gentle or harsh, has in common. Pressure and release of pressure is the way we communicate with horses. When you take the slack out of a lead or a rein to ask for a turn, you are using pressure. When you add leg, or shift your weight in the saddle to signal a change of gait, you are using pressure.
Pressure is our universal language. To be safe around horses, they need to learn to move away from pressure. The question is not whether we make this part of our training, but HOW we teach it to the horse. In clicker training pressure becomes information the horse uses to get to his reward faster. From his point of view he is just playing the children’s game of “hot and cold"? Pressure is not meant to intimidate or cause pain.
Lesson 2 shows you how to introduce the concept of moving away from pressure to your horse. It begins with a very simple exercise which is particularly useful for pushy, bargy horses: backing in a stall or small paddock.
The purpose of this lesson is twofold: to teach your horse to move away from pressure and to teach him how to maneuver his body in tight, trappy spaces. This later piece connects the turning of his hips to you and gives you control of his feet.
When a horse is first asked to back near a wall, many horses will feel stuck. They don’t realize that they can just swing their hindquarters over and continue to back. Instead the only options they see are either barging forward over their handler, or planting their feet and growing roots.
Through this very simple exercise we are teaching the horse to be more aware of his whole body. As he learns to swing his hips to the side and back out of your space, click!, good things happen. All the pressure goes away AND he gets a treat. In addition to learning an important physical skill, he’s also learning emotional control and relaxation.
In addition to learning an important physical skill, he’s going to be learning emotional control and relaxation. He’s going to discover that turning into a freight train and barging over the top of you isn’t the only solution available to him. When he finds himself in a tight, trappy situation, instead of panicing or freezing, he can look to you for guidance to help him out.
Working in a stall or small paddock helps a horse learn how to maneuver his body, and it also helps the handler learn how to set his horse up for success. The video uses slow motion and freeze frame footage to teach the mechanical skills needed for this lesson. It highlights a fundamental handling skill which is one of the key building blocks for many critical ground exercises, including head lowering and lateral work.
From backing in a stall the video lesson progresses to basic leading. Here I let Max, a three month old Friesian colt, and his owner teach the lesson. Backing, moving the hips and shoulders, yielding softly to pressure on a lead, and the beginnings of ground tying are illustrated clearly by this youngster.
The second half of the tape extends the concept of moving away from pressure to teach the beginnings of lateral work. I use my young horse, Robin, a Cleveland Bay cross, to illustrate how you can focus on individual parts of the horse and get them yielding to you. This “duct tape? lesson, as I refer to it, is the cornerstone in the development of both basic control and all upper-level performance work. The video shows you how you can take a basic “move away from pressure? lesson and combine it with the clicker to produce an incredibly light, and responsive horse. This is the beginning of the development of a beautiful, elegant carriage that has become the hallmark of our clicker- trained horses.
It’s all well and good to watch a trained horse perform, but it’s often much more useful to see how you work with a horse who doesn’t know anything about lateral work. In the final section of the tape, you get to watch our Icelandic stallion, Sindri, in his second in-hand clicker training session. Sindri began this lesson by crowding in on me and wrapping his body around mine. Never mind lateral work, just walking a straight line with him was our first goal. Sindri’s eagerness to be right there next to you made this almost impossible. The solution was systematically to teach him to move his hips and shoulders away from pressure. The result was the beginning of lateral work and lunging.
When we taped this session, I was not wearing a microphone, so the sound quality is not as sharp as I would like it to be. However, it was such a good visual, I felt it was important to include this footage with the rest of the lesson. This part of the lesson is especially for all of you who have felt totally left out when you have listened to an experienced horse person describing a horse’s movement. If you have trouble seeing what they are talking about, you will really appreciate the slow motion segments in this tape.
From lunging to lateral work you’ll learn how to ask a horse to carry himself in balance instead of crowding into you. Through slow motion and freeze frame footage, I highlight the important mechanical skills you’ll need for this lesson, and the responses you can expect from your horse. In addition to a basic clicker lesson, you’ll be training your eye to see and understand the balance shifts that help a horse perform at his best.
32,00 €
Endpreis, zzgl. Versandkosten
- 0,15 kg
- nur noch begrenzte Anzahl vorhanden
- 5 - 8 Tage Lieferzeit
Lesson 3: Head Lowering. Your Calm-Down Cue
Imagine the following: your horse has stepped on his lead, or set back against a tie. In the past he would have felt trapped by the pressure and pulled harder, but after you’ve taken him through the head lowering lesson on this tape, he’ll understand that there’s another option.Now he’ll yield to the pressure and drop his head. Instead of having a wreck, he’ll know how to put the slack back into the lead.
Or maybe your horse is the one that rears when he gets excited. On the ground or under saddle his response to pressure is to stand up on his hind legs. With this lesson, you’ll show him alternatives to these theatrics that will make him much safer to be around.
Or suppose you’ve taken your horse to the county fair. Your friend’s horse is going crazy, leaping and rearing up. But you’ve taught your horse the “demand cue to calm down?. You’ve given him a way to handle his fear.
This lesson teaches your horse patience. It shows you how to build duration with the clicker. If you’ve experimented with clicker training, you’ve probably discovered how eager horses become to show off behaviors they’ve learned. That can be great fun at first, but it may not feel very stable. Your horse may feel like an equine yo yo, offering the same bits of behavior over and over again to earn reinforcement. This tape shows you how to combine the clicker with pressure and release of pressure to build duration into the head-lowering behavior. In the process your horse will be learning patience. He’ll learn that if he wants to earn reinforcement, he has to control his fidgety, fussy, push-into-you, run-for-the-next-county desires. Instead he has to stand quietly waiting for you to click.
Head-lowering teaches emotional control, and it also teaches physical balance. If your goal is up-level performance, the head lowering exercise is an important foundation skill. Why? Because this head-lowering exercise teaches your horse how to shift his weight back into his hindquarters and to stretch through the entire length of his spine. If your horse leans down onto his shoulders, or over-flexes laterally, this exercise will teach him how to get up off his shoulders and elevate the base of his neck. The more you ask your horse to collect, the more you also need to be able to ask him to stretch down through his whole spine.
The video features four horses:
Leyden, a four year old Dutch warmblood gelding who knows he’s big and knows how to use his shoulder weight to barge through his owner. Leyden’s behavior is typical of many youngsters. He illustrates well all the steps horses go through as they learn the head lowering lesson.
Sindri, the six year old Icelandic stallion featured in Lesson 2. Sindri shows you how to take the head-lowering lesson beyond basics to develop soft, light control.
Gregor, a twelve year old approved Dutch warmblood stallion. Gregor was bred to be an Olympic-level performer, but his original trainers used too much force with him. he became instead an aggressive, dangerous, come-at-you-with-his-teeth horse. On the tape you’ll see how his present owner takes him through the head lowering lessons to a place of calmness where he can learn to trust people.
Blitz, a six year old quarter horse. Blitz is a good-natured, easy going horse. His issue isn’t fear, so much as it is balance. Under saddle Blitz is stiff and above the bit. The head-lowering exercise teaches his teenage owner how to be rounder and more forward in his gaits. Blitz’s lesson show you how to take the ground exercises and connect them to riding.
32,00 €
Endpreis, zzgl. Versandkosten
- 0,15 kg
- nur noch begrenzte Anzahl vorhanden
- 5 - 8 Tage Lieferzeit
Lesson 4: Stimulus Control Putting Behavior on Cue
What does respect mean to you and how do you teach it?
Respect is an interesting word. Most of us can recognize it when we see it, but we may have trouble defining it, and even more importantly, explaining how we teach it.
This is in part because respect can have many different meanings and origins. In clicker training respect grows out of stimulus control. it is a by-product of good training. What do I mean by that?
When you teach a new behavior with the clicker, you’ll find your horse goes through two distinct phases. In the first phase you’re simply getting behavior to happen. At this point your horse doesn’t understand anything about cues. He simply knows that everytime he offers a particular behavior, click, you give him a treat.
From his point of view it’s a wonderful game. It’s almost as though he has YOU on cue! His behavior is a trigger that gets you to reach into your pocket and hand him goodies. Is it any wonder that horses love the clicker game?
This phase is a lot of fun. You get to see how eager and smart your horse is. But it can also feel very out of control. All you want to do is groom your horse, and he’s trying every behavior he can think of to get you to play the “clicker game?. At this point you need to move on to “Phase Two? of clicker training and put the behaviors on cue.
This two hour is divided into three parts.
Part 1: Stimulus Control covers:
What are cues?
How do you teach them?
How do you use cues to develop great manners in your horse?
Part 2: Riding with the Clicker
Communication through the reins
Chunking your riding lessons down into small steps to teach cues
A riding lesson on single-rein basics and the clicker
Part 3: Communication through Cues
Environmental Cues
Cues: developing a two-way conversation with your horse.
The video features four horses: Robin, a seven year old Cleveland Bay cross. With Robin I take you through a basic lesson in stimulus control, how you teach it, and what you can do with it. Peregrine, my seventeen year old thoroughbred. Peregrine takes us through a master class on riding with the clicker. Nikita, a twelve year old quarter horse mare. Nikita is having her first lesson under saddle using the clicker. She shows you how to get your own horse to go from stiff to soft through a clear progression of steps. And lastly, Panda an eighteen month old miniature horse in training to be a guide for the blind. Panda demonstrates the use of environmental cues. And she also shows how cues can develop into a two-way communication system between you and your horse.
32,00 €
Endpreis, zzgl. Versandkosten
- 0,15 kg
- nur noch begrenzte Anzahl vorhanden
- 5 - 8 Tage Lieferzeit
Lesson 5: The "Why Would You Leave Me?" Game
The “Why would you leave me?” Game is one of the key lessons featured in “The Click That Teaches: Riding with the Clicker”. Essentially this lesson teaches your horse loose leash leading. It begins by teaching your horse to walk with you on a slack lead - no pulling, forging ahead, or lagging behind. Perfected the lesson takes you straight to lateral work and beautiful liberty training.
When I was first learning about lateral work, some twenty plus years ago, the teaching was not exactly fun for the horses (or the handlers). But I was willing to ask my horse to go through those tough lessons because I was convinced that lateral work was good for him. It would help him to move better and to remain sounder longer.
Now all these years later I am all the more convinced of the value of lateral work. I know it contributes to long term soundness. But with clicker training the teaching process has become much easier - and a lot more fun for everyone. Once you know what to look for, lateral flexions pop out of many of the lessons you've been learning in this lesson series. It's like the old expression: all roads lead to Rome. Well in this case all lessons lead to lateral flexions!
In Lesson 2: Ground Manners lateral flexions were introduced via the duct tape lesson. Now in this DVD I show you they are the natural by-product of this simple loose-lead leading exercise.
32,00 €
Endpreis, zzgl. Versandkosten
- 0,15 kg
- leider ausverkauft

Lesson 6: Shaping on a Point of Contact
On the surface "Shaping on a Point of Contact" is a lesson on standing on a mat - one of the foundation lessons. That's on the surface. What it is really about is learning how to work on a release to create the balance needed for upper-level performance.
The film features Keri Gorman and her three year old percheron cross, Oliver. Keri brought Oliver to the Oct. Toutle WA clinic. Oliver was originally a PMU foal. Keri got him when he was a year old. She's done a magnificent job with him. He's a good traveller. He's emotionally solid. He leads well. He's a very pleasant youngster, but . . . There's always a but. He was also three-year-old gangly. On Sat. Keri brought him into the arena to get him oriented to the new environment. She was going through the foundation exercises, including mat work. Oliver was great. He understood the mat, was willing to stand on it. But he was never square. Whenever he stopped, his legs were always sprawled every which way.
I've been wanting to get some good video of mat work for a video on mounting blocks, but I hadn't had the right horse for filming. What Oliver was doing was perfect for what I wanted. But we didn't have good light. So it was: Stop! Don't do any more. Let's wait until tomorrow when we have better light. We worked with Oliver just a few more minutes, then I did a long session with Keri going through the rope handling skills she'd need the next day in her session with Oliver. We uncovered some really important layers that needed to be shared. And of course - we weren't filming. Ah well.
That was Saturday. On Sunday we brought out the camera and got some awesome footage. I started with two ground work sessions on rope handling skills, one with another clinic participant and the other with Keri. We covered the mechanics of the lead handling: how you shape on a point of contact - what that means and how you do it. We looked at core structure, finding your t'ai chi power so you can be powerful without being aggressive. We looked at the difference between gross and fine motor control, the effect each has on the feel down the lead and the ability to release the hand. Very interesting the difference there! We explored the effect of steady contact versus working on a release. That was fascinating and such a key concept. Between the two sessions we covered many core elements of good rope handling.
And then Keri worked Oliver. He started out a little nervous. He saw his first deer, and there were goats grazing in an adjoining field that he wasn't so sure about. His nervousness turned out to be a huge asset for the taping. Keri did a beautiful job handling him, illustrating well what going to a point of contact and waiting for a give means.
Oliver was also very wiggly. Anytime Keri touched the lead, he would curl around her in a lateral bend. "For every exercise you teach there is an opposite exercise you must teach to keep things in balance." For those of you with horses that are at this wiggly stage, this will be a very useful video. Keri found the tools she needed to balance the wiggliness. In the process Oliver shifted from being a gangly three year old to a "Fred Astaire" dance partner. Very, very neat!
We filmed him again the next day and the change in him was startling. He stood square - but not just, yeah he's got his front feet together square - he was lifting through his back and the base of his neck. He was gorgeous! I made some still photos from the video to compare his before and after balance. The change is startling.
So we got good video. But more than that, we covered some very important concepts. The real core of the lesson was this: when you sit on your horse, he will either protect his spine, or he will offer you his spine. You want him to offer you his spine because that's how you get enhanced movement.
What does this mean? One of the "t'ai chi" awareness exercises I shared with Keri and included on the video is a warm-up exercise for the head and neck. It's a simple exercise that I often use to help people understand - by feeling it for themselves - the changes we are asking the horse to give us in the initial stages of a lateral flexion. The concept is: when you break a movement down into its component parts, you change the nature of the movement. That's the whole essence of clicker training. We're splitters, not lumpers. This exercise let's you experience first hand what that means.
When I use this exercise in clinics I first have people glance behind them. I ask them to make note of what they see when they glance over their shoulder. Then we go through the lesson, breaking the movement down into three steps. When I have them glance over their shoulder at the end of the process, most people will report that they can see much further around.
All good. But I can increase the range of motion yet again by guiding the process with my hands. If I stand behind someone and place my fingers gently just behind her ears, I can guide the process. What emerges is not just a freer turn of the head, but a coming alive of the entire spine. You get a real "cat stretch" lifting through the shoulder blades (the withers), that comes up from the pelvis. The spine is coming alive with energy - exactly what we want our horse's spine to do when we ride.
Sometimes I will have the person stand behind me and feel these changes by resting a hand between my shoulder blades. Almost invariably the person will press too hard and I will feel my spine stiffen. I can't give them that lovely full "cat stretch" sensation, much as I want to. My spine is protecting itself. I can go through the outer trappings of the movement, but that really glorious feel of the "cat stretch" will elude them. But lighten the fingers, take the guardedness away, and it is there to be had.
This is such an important piece to understand for our horses. Are you getting the outer trappings of a movement, or the real thing where the horse lets you inside and offers you his spine? You can't demand this. The more you demand, the more he will protect himself. This is something he gives you because he trusts you enough to let you inside.
And that's what we got on video. It was one of those perfect sessions where Keri and Oliver were at the right stage in their work together to make this leap in connection. And what is even better - we got it on film!
Shaping on a Point of Contact is part of a series of DVDs which are designed to accompany the Riding book. These DVDs illustrate the major lessons and concepts covered in the riding book.
32,00 €
Endpreis, zzgl. Versandkosten
- 0,15 kg
- leider ausverkauft

Lesson 7: T'ai Chi Rope Handling Exercises
"Training is a mechanical skill. Don't let mechanics get in the way of good training." Bob Bailey
This DVD covers the morning ground work that I include in my clinics. In these sessions we leave the horses in their stalls to take a nap while their owners work on their mechanical skills. These sessions are extremely valuable. We work out the details of how we are going to ask for something before we involve the horse. This lesson looks at what I refer to as "t'ai chi" rope handling skills.
We begin by experiencing what the lead feels like to your horse. How much can you perceive when you are tense versus relaxed? Are you balanced and how does that effect your horse. Do you know how to use the alignment of your bones and bone rotations so you can be powerful and effective without being forceful or aggressive? I use a series of Laing Gong exercises which I learned from James Shaw ("T'ai Chi for Equestrians: shawtaichi.com) to help explain the rope handling skills I incorporate the clicker training. This DVD will be especially useful to all of you who are using the Riding book and who cannot get to one of my clinics.
The word exercise can put many people off. Don't think push ups or jumping jacks. The best way to describe them is to quote from James' book "Ride from Within."
"Laing Gong is a complete set of therapeutic exercises designed to unblock and create a strong flow of internal energy (chi) throughout the body. . . Beyond the general health benefits of these exercises are gains of particular interest to riders. Laing Gong enhances the range of motion in your joints while maintaining the structural balance essential in riding, and through Laing Gong, you develop highly sensitive control of your physical body as well as focus and concentration of the mind. These exercises . . . quickly and effectively increase your body's ability to ride." Ride from Within by James Shaw
In this new DVD I am presenting the Laing Gong exercises which I have found to be the most useful in understanding and accessing the rope handling skills I teach. I had help on this DVD from Ilse de Wit of the Canadian Clicker Centre. First I teach the exercises to Ilse, then we explore how they relate to ground work and to riding. We look at how you can develop better sensitivity and feel down a rope, how to improve your balance and riding position, how to use bone alignments to be powerful and effective without being forceful or aggressive.
The lesson explains why the rope mechanics work the way they do. And the exercises take you to the "t'ai chi" walk (see the Riding book - Chapter 24.) Good rope mechanics are very dependent upon being able to "walk and chew gum." Can you slide down a lead rope and step up into a balanced structure? In other words, are you using your core when you use a lead? Do you know what that means?
I also relate these exercises to riding. We look at what creates a stable, powerful riding position. We contrast this with what contributes to backwards traction and a rider who must hold onto the reins or lose her balance. We look at what allows a rider to stabilize her hand effectively versus one who is easily pulled out of the saddle. What are the subtle changes that gives a rider a secure, grounded seat?
This DVD is the third in a series of lessons which are designed to accompany the riding book. Later in the series we'll look at the underlying mechanical skills that lead to riding success. This lesson focuses on rope handling and body alignment.
32,00 €
Endpreis, zzgl. Versandkosten
- 0,15 kg
- nur noch begrenzte Anzahl vorhanden
- 5 - 8 Tage Lieferzeit

Lesson 8: Three-Flip-Three Understanding Lateral Flexions
All horses will at times fall in on their inside shoulder, and they will drift out through their outside shoulder. If you have ridden, you have experienced this. You've been on a circle that seemed to spiral in on itself. That's your horse falling in on his inside shoulder. Or you wanted to turn across the center of the arena, but your horse kept walking down the long side toward his buddies. You could turn his nose, but he still kept drifting through his outside shoulder.
Loss of balance and its related loss of connection to the rider can be that obvious, and it can also be very subtle. This DVD helps you identify those moments where your horse is falling out of balance and you are losing your connection with him.
It begins with a short review of the "Why would you leave me?" lesson. That lesson, described in detail in the "Why would you leave me?" DVD, uses cones set out on a circle to teach your horse to stay with you and walk on a loose lead. The handler learns to recognize when her horse is connected to her, and when he is leaning in on her, or drifting away from her. As the horse connects more and more to his handler and keeps himself on the circle, the beginnings of lateral flexions evolve.
This DVD shows you how to turn this lesson into a counted pattern that gives you the ability to separate from the circle without losing the good balance you have created. Like a gymnast on a balance beam, your horse learns how to keep himself aligned even as the patterns you are asking for become more complex.
This DVD eavesdrops in on a lesson where the handler is learning how to move from the "Why would you leave me?" circle exercise to the counted pattern of "Three-Flip-Three". Her questions -the places where she tripped over her own feet, or couldn't figure out how the pieces of the puzzle fit together - are very much the questions you will encounter when you first explore this lesson. You'll see not the finished, polished product, but how that product is produced, layer by shaping layer.
The DVD also includes some great "t'ai chi walk" analysis of three-flip-three as the handler sorts out the pattern in her own body so she can understand better what she wants her horse to do.
The final section of the DVD looks as practical applications for lateral flexions. Lateral flexions help create not just physical balance, but also emotional balance. You'll see how to use them to:
* get your horse past things that are frightening him.
* to help a timid horse deal with riding in company.
* to maneuver past obstacles out on a trail.
* to teach your horse how to go down a hill without rushing.
Lateral flexions are the key to good balance. They help develop great gaits, they maintain soundness, and they build emotional stability. This DVD begins an exploration of lateral flexions, what they are, how to teach them to your horse, how to adjust them when your horse falls out of balance or overflexes, and how to use them for safety and performance.
This DVD is the fourth in a series I am producing to accompany "The Click That Teaches: Riding with the Clicker". It is intended to be used in conjunction with those other DVDs and the book.
32,00 €
Endpreis, zzgl. Versandkosten
- 0,15 kg
- nur noch begrenzte Anzahl vorhanden
- 5 - 8 Tage Lieferzeit

Lesson 9: Overcoming Fear and the Power of Cues
This DVD shows a real gem of a session. It features Muska, a seven year old Icelandic mare I met in the summer of 2007.
Muska is owned by Nick and Cherrie Foot. Muska's previous owners had started her under saddle. When she had about a month’s worth of rides behind her, they put their granddaughter up on her. That would have been fine, except nobody remembered to check the girth. You know the rest of the story. The saddle slid under Muska's belly. The granddaughter fell off. And Muska was in a panic. And the end result was Moska became terrified of saddles.
Nick bought her knowing she had this problem because, as you’ll see on the DVD, she’s a very sweet horse and it seemed a shame that something like this would be the undoing of what was otherwise a very lovely mare.
Nick and his wife had begun exploring clicker training. They’d made progress. Muska had learned to target the saddle, but she was still profoundly wary of it and it could take as much as forty minutes or more of patient work to get the saddle on her.
This is such a common situation people find themselves in with their horses. Some unfortunate series of events has left the horse with an overwhelming fear. In Muska's case, she was afraid of saddles, but it could just as easily have been clippers, or shots, or plastic tarps, etc. . You fill in the blank. You have a horse that is afraid of __________. What do you do? That's the question this DVD explores. But it is so much more than a simple lesson in desensitization. What this DVD really looks at is the power of cues: how they evolve and how we can use them to change our horse's response to the things that frighten them.
Every now and then you get a perfect gem of a session, one that clarifies a concept, or illustrates a particular lesson. And that’s what happened with Muska's lesson. And for a change, when we got the camera out, everything worked, we had enough tape, the battery didn’t run out mid-way through the session, the threatening rain clouds held off until we were finished, and best of all the horse cooperated by giving us a great session.
So what are you going to see on this DVD?
You’re going to see the foundation lessons used to solve a major fear issue. If you’re fairly new to clicker training, you may have gone through the first few lessons thinking - so what? How do I use these things that I’ve taught my horse. In this lesson, you’ll see the foundation lessons come alive. You’ll see how useful they are in resolving fear and space issues.
But more than that this is a lesson in timing, the importance of mechanical skills, chunking lessons down into small steps and reading your horse. I think you’re going to learn a lot from it.
In the first part of the DVD I’m working with Muska. In the second half, I turn her over to Nick. I do so appreciate all the people who participate in these DVDs. They help so many others succeed with clicker training by sharing their own learning curve.
Sometimes when you watch a session, it can look easy. Getting the timing right, all of that looks so smooth on the tape. How hard can it be? Nick shows you that getting all the details right is anything but easy. It’s so useful to watch somebody else sorting through the process to help you remember all the details that need to be kept track of. So Nick - thank you for sharing.
If you are at the stage where you and your horse are struggling to connect, watching this part of the DVD may help you spot some of those little details that are frustrating or confusing your horse and making it difficult for him to do what you want.
So again, I really thank Nick for being willing to have the camera running while he was at the stage where the lesson feels anything but smooth and easy.
That’s part of what is on this DVD. Something else that’s important is the reading of body language. I think Muska is very expressive. We'll be looking together at all the places where she is asking questions, where we need to notice her concern, her worry. I'll show you how you can manage your mechanical skills to provide answers to your horses small questions so they don't build up into big worries. You'll be learning how to listen to and be responsive to your horse's emotional needs.
And finally the real gem that came out of this session is the power of cues. You’re going to see how quickly an action evolves into a cue, how important it is to recognize and use this process. You’re going to see how you can put cues to work for you.
At the beginning of the tape the saddle is most definitely a cue to leave - by the end of the lesson it has evolved into something very different. Cues and the process that evolves them, and their use with fear issues is one of the major lessons of this DVD.
So overcoming a fear issue, head lowering, timing, mechanical skills, building duration, advance and retreat, reading body language, and the power of cues - it’s all in there! Enjoy!
32,00 €
Endpreis, zzgl. Versandkosten
- 0,15 kg
- nur noch begrenzte Anzahl vorhanden
- 5 - 8 Tage Lieferzeit

Lesson 10: Microshaping Learning To See The Smallest Try
Shaping is the backbone of clicker training. When we click the clicker to highlight a desired behavior in our horses we are shaping behavior. We are selectively reinforcing that behavior making it more likely that the horse will repeat it in the future. From the very first lesson in targeting you have been learning how to shape behavior with the clicker.
The question is: are you a good shaper? Do you see small details of movement and do you know how to use them? Are you a splitter of behavior or a lumper? Splitters see detail. They train in tiny steps which makes it easier for their horses to learn from them. Lumpers ask for too much too fast. This often creates frustration and confusion in their horses. Nowhere is this seen more clearly than in freeshaping.
When you freeshape you are not luring the behavior with targets or triggering it in any other way through your direct actions. You are simply observing your animal and marking desired responses with a click and a treat.
Microshaping is a term coined by the UK dog trainer, Kay Laurence. It refers to splitters versus lumpers. Microshaping lets you maintain high rates of reinforcement by looking at the underlying reaction patterns that create complex movements. Kay Laurence began exploring microshaping because she was concerned by what she saw in the canine clicker community. People were taking too many shortcuts to get to their end goal. They were creating frustrated, anxious learners and the behavior they were ending up with in the show rings was many times biomechanically incorrect. So Kay started looking at the underlying reaction patterns that went into the movements these handlers were trying to shape. In other words, what happens just before a dog sits, or backs up? Can you see the small movement that predicts the larger target behavior? When Kay taught her students to train using microshaping, she saw improved learning success and much happier dogs.
Micromovements are at the core of single-rein riding, so Kay's work certainly got my attention. One of the many things she stressed in microshaping was the need for a high rate of reinforcement. With the dogs she trained in short trials, a minute at a time for a session, but in that minute the dog experienced a high rate of success because it was being was being reinforced for such tiny increments of improvement. The result was happy, eager dogs who very much understood and could reproduce reliably a very high quality of performance.
Such short training sessions don't seem very practical with horses, and at times they aren't even possible. At clinics I am often working with horses who are falling apart emotionally. They are in an unfamiliar environment, away from their pasture mates, and they are afraid. We can't easily work them for a minute and then put them away. We need to keep these horses engaged with us to keep them safe. But an upset horse can be a challenge to work with. Their focus is outside the ring. It's all on leaving, getting back to the security of their home herd.
Figuring out safe, clicker-compatible ways to work with these upset horses was the origin of the microshaping strategy that is featured on this DVD. You'll learn how to bring an anxious horse's focus back onto you by simply slouching against the side of his pen and watching for micromovements to click. No chasing him around round pens, no driving his feet into motion. The motto for this style of training could easily be: why sweat when you can slouch?
The microshaping strategy is an excellent way for handlers to learn to see detail. That makes it a perfect DVD to watch before you launch into the single-rein riding techniques taught in the later DVDs. Single-rein riding is all about seeing detail. This DVD will show you not only how to see detail, but also how to use it to create beautiful balance. It introduces you to "Equine Pilates", to shaping for a sound spine.
32,00 €
Endpreis, zzgl. Versandkosten
- 0,15 kg
- nur noch begrenzte Anzahl vorhanden
- 5 - 8 Tage Lieferzeit
Lesson 11: Capture the Saddle The Mounting Block Lesson
Capture the Saddle: The Mounting Block Lesson teaches great mounting block manners, plus it sets the stage for single-rein riding.
The DVD is divided into two parts. The first half focuses on the mounting block lesson. Once I got the rider up, I couldn't just leave them there, waiting for the next DVD to come out, so the second half looks at a very basic single-rein riding exercise. You'll see the beginning steps that teach you how to ride on a triangle of the reins.
Please note: I know many people think they can skip this lesson because they can already get on their horse. But this lesson isn't just about getting on.
The Mounting Block Lesson covers many key steps. It begins with an important ground work exercise that prepares the horse for riding. It makes sure that your horse understands rein cues and will respond to them before you get on. That's a critical safety step. It teaches your horse great mounting block manners. The end result of this lesson is a horse that will bring himself to the mounting block, line himself up and wait patiently while the rider gets on.
That's the first half of the lesson. The second half introduces you to a basic single-rein riding lesson. It looks at some of the key skills needed, the details that can make a huge difference to your horse, and it shows you the impact those details have on your horse's balance. This is an important lesson for building first riding safety, and then great balance.
32,00 €
Endpreis, zzgl. Versandkosten
- 0,15 kg
- verfügbar
- 5 - 8 Tage Lieferzeit
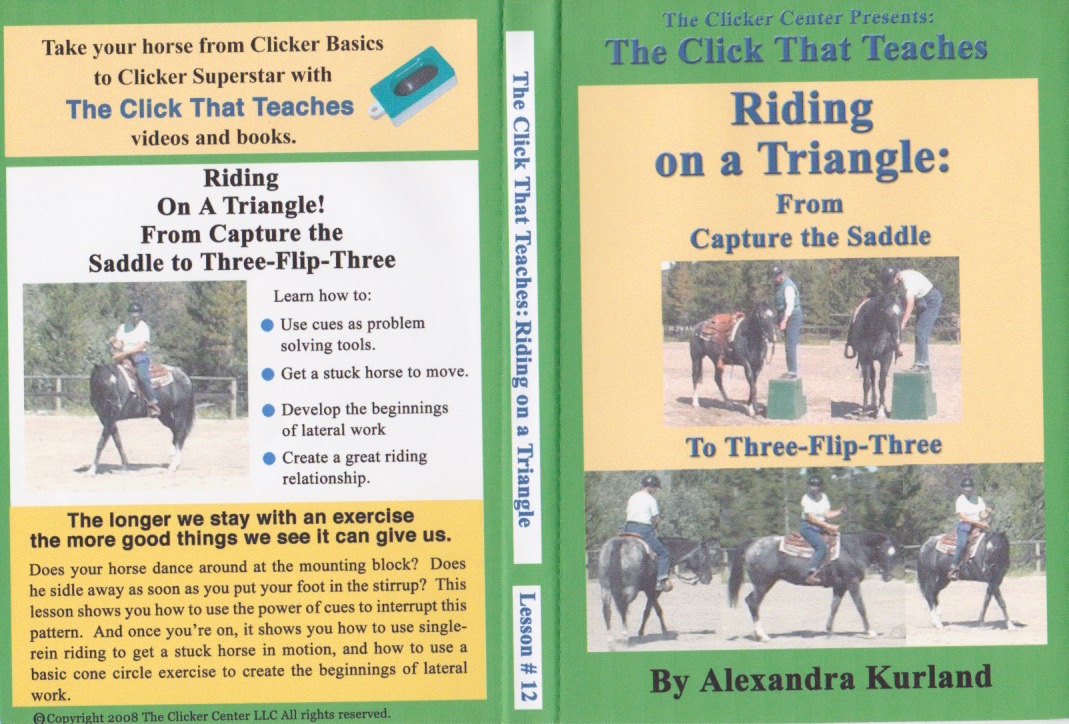
Lesson 12: Riding on a Triangle
The longer we stay with an exercise the more good things it gives us.
This lesson beautifully illustrates this concept. It begins by looking at a very frustrating problem; a horse that siddles backwards each time the rider starts to get on. Over time horse and rider have evolved a long dance routine at the mounting block. The horse lines up beautifully, but she reads any move towards the stirrup as a cue to back up. Back up, come forward, back again. We've probably all seen it. This kind of mounting block jig is very common.
So the lesson begins by looking at the power of cues to interrupt this long standing pattern. It adds extra layers to the "Capture the Saddle" lesson presented in Lesson 11.
In the "Capture the Saddle" DVD you learn how to ask the horse to soften his jaw to the side and yield his hips to bring him to a stand still at the mounting block. So obviously, yielding the hips can get a horse to stop. Yielding the hips can also get a horse to go. The same basic exercise can create two very different results. In this DVD you'll see how we get a stuck horse to connect her feet to the reins and to go into motion.
That same softening the jaw and connecting the feet to the hips can now be used to ride a simple pattern around a circle of cones. This is the same exercise I introduced in the "Capture the Saddle" DVD, but now I'm going to take it a step further to show you an easy way to pop out the beginnings of lateral flexions. So in this one lesson we go from a stuck-in-cement horse to one that is beginning to flow into lateral flexions.
At the end of the lesson, just for fun, I show you what a horse can do who understands good balance.
32,00 €
Endpreis, zzgl. Versandkosten
- 0,15 kg
- verfügbar
- 5 - 8 Tage Lieferzeit

Lesson 13: Helen House Horse
In my book, "The Click That Teaches:Riding with the Clicker", I describe in detail the process of riding on a triangle - why you want to, what it does for your horse, how you introduce and develop it. The book gives you the framework around which these DVD lessons are presented. What I know from working with people is reading is an important part of understanding this work, but it needs to be accompanied by seeing what it looks like and getting the feel of it in your own body. The DVDs are an important part of this process.
If you've been working your way through the rest of the DVDs in this series, you're probably itching to get on and ride. You may have even given single-rein riding a try, and you no doubt have some questions about the rein mechanics. How do you slide down the rein? What are you supposed to be doing with your top hand? What is this soggy triangle that you've been reading about? And what is the triangle anyway that the reins are supposed to form? And how does this help you to connect to your horse and to ride better?
These questions and many others are answered on this DVD. It begins with a demo of the single-rein riding mechanics in which I go through the basic technique of sliding down the rein and then I show you many of the little details I've discovered that make a huge difference to the feel down the rein, the security of your seat, and the clarity of the communication.
The second half of the DVD shares with you some individual sessions participants at one of the 2008 summer clinics had on Helen House Horse. Watching them discover what a huge difference little details can make in their connection down the reins will help you with your own rein mechanics. You'll understand how to use bone rotations to create a soft feel down the rein. You'll be relaxed, but stable in your seat. Your horse won't be able to root you out of the saddle. You'll learn how to have a deep, secure seat, one that relies on good structure not tension to keep you in the saddle.
Mechanics matter. That's what we've seen over and over in this series. Both on the ground and under saddle, good mechanics make a huge difference to your horse. In this lesson you'll see how the t'ai chi rope handling skills evolve easily into the mechanics of riding on a triangle. Everything is everything else - as you'll see in this lesson.
32,00 €
Endpreis, zzgl. Versandkosten
- 0,15 kg
- nur noch begrenzte Anzahl vorhanden
- 5 - 8 Tage Lieferzeit

Lesson 14: The Poisoned Cue. Presented by Dr. Jesús Rosales-Ruiz
Poisoned Cues:
- What are they?
- What effect do they have on behavior?
- What long-term problems do they create?
- Can you retrain a poisoned Cue?
This much anticipated presentation is an expanded version of the lecture Dr. Jesús Rosales-Ruiz has presented at the Clicker Expo. In conversation with Alexandra Kurland the poisoned cue is discussed both in general terms and then specifically as it applies to horse training.#
Even good trainers can end up accidentally poisoning a training process. The Poisoned Cue DVD helps you understand what this means. It shows you how to recognize the "poisoned cue" look, and it also shows the contrast - what we want, happy "ven" animals. You'll find out what that means in the DVD.
43,00 €
Endpreis, zzgl. Versandkosten
- 0,15 kg
- verfügbar
- 5 - 8 Tage Lieferzeit

Lesson 15: Microriding Creating Thinking Riders for our Thinking Horses
In the Microshaping DVD you learned how to be a better visual observer. Now in the Microriding lesson you'll learn how to be a better kinesthetic observer. We'll explore the three circuits that create a grounded, connected, body-aware, energized rider.
The Three Microriding Circuits:
- The Grounding Circuit
- The Crown Circuit
- The Diaphragm Circuit
Learn what these circuits are and how they can be used in riding in this two DVD, four hour lesson.
This DVD can be watched at any point in the series. In fact, this lesson is easy to lift out of the clicker training structure in which it evolved to use in other more traditional riding lessons. If you are taking lessons, you might want to share it with your instructor. Who knows, you might find it's a great way to introduce people to the rest of clicker training!
38,00 €
Endpreis, zzgl. Versandkosten
- 0,15 kg
- nur noch begrenzte Anzahl vorhanden
- 5 - 8 Tage Lieferzeit

Lesson 16: Whoa! Stop! Finding Your Horse's Brakes
This lesson looks at a very essential question. Do you know how to stop your horse? And do you know how to stop him using a single rein - without pulling back - even when he's upset - and at the exact spot you picked out?
Good questions. The lesson shows you how to get there using the same circle around a cone exercise that I introduced you to in the "Capture the Saddle" DVD. In that lesson you learned how to steer a horse using single rein/riding on a triangle techniques. In this lesson you'll be using that same basic pattern - only this time the focus will be on stopping your horse.
Finding Whoa
The lesson features Hannah and her horse Lizzie. Lizzie came into the arena having an emotional fit. She was all wound up, screaming for her stable mate who had also come on the course but was now out of sight back in the barn. We've probably all had this ride. Your horse is tight as a drum, head up, sides vibrating with the force of the screams. Hannah was doing an excellent job staying with Lizzy, but we needed to interrupt the behavior and create, if possible, a change in emotions. Hannah was using the tools she had been taught in traditional riding lessons. That meant she had taken a firm hold of the reins. I wanted her to let go. Now that is the complete opposite of what riders want to do in this type of situation. The last thing that feels safe or productive is releasing the reins, but Hannah managed to follow my instructions. It really is quite remarkable to see the change in Lizzie. Literally in the time it has taken for me to type these last couple of sentences, she started to settle.
It was a fun lesson to watch. Hannah did a superb job riding it. And for once I had the video camera running from start to finish. The batteries didn't give out. I didn't run out of tape. We got the whole lesson recorded. And we were able to do a follow-up lesson the next day which was also filmed. The result is a great illustration of this very basic, but oh so important, lesson. Hannah did a superb job transitioning into the single-rein riding. It's a great lesson to watch because so many people find themselves at this same place in their riding. They're used to more traditional rein handling techniques. Taking the plunge into single-rein riding can seem at times as though you are jumping off a cliff. It's good to watch this lesson and to see that actually there is a wonderfully soft parachute waiting to catch you. Hannah shows you how doable the transition into single-rein riding really is.
Finding Go
That's the first lesson on the DVD. We build single-rein-riding brakes for Lizzie. Once you've got "whoa" it's good to have "go". In that same clinic we had another horse, Shiney, who had very little engine. Shiney is a wonderfully pleasant horse, a very appropriate match for his novice rider. If riding Lizzie was like trying to stay on top of a ball bouncing off the walls in a pin ball machine, riding Shiney was the complete opposite. Again, this will be an all too familiar ride for many of you. You know what its like trying to ride a horse who feels as though he's pulling his feet out of molasses.
Sarah started out carrying a dressage whip as she tried to keep the engine going long enough to get around a circle of cones. I had her set aside the whip and instead give single-rein riding a try. We used the same round-the-cone set up that had worked so well for Hannah and Lizzy, but now the goal was the complete opposite. In Hannah's ride we were looking for halts. In Sarah's ride we wanted energy. The lesson shows how the same set-up can generate both. It's a really fun concept. Your intent - what you are looking for from the turn - determines what you get: whoa or go.
This is actually a really important lesson to consider. If every horse you sit on seems to want to go, go, go without ever wanting to stop, perhaps that is what your energy, your seat is telling them. Do you have a down transition in your body? The lesson Lizzie and Hannah rode will help you find it. And if you have trouble finding the "keys to the ignition", riding the turns as Sarah did may help you connect to more energy.
Goals
I had just enough time at the end of the DVD to include another great ride I got on tape last summer. Again we were using the cone circle, but this lesson illustrates the importance of managing your goals so they don't take over. What do I mean by that? The lesson features Leslie and her very green, somewhat reactive mare, Charlotte. The task was to get on and ride over to the cone circle and the central mat. Now what many riders will do in this situation is they will ride a direct path to the mat - no matter what. If their horse over rotates through a turn, they over correct. They ask for a turn to the right which their horse gives them. But when they get more turn than they need, they block the turn and send the horse back to the left. Then they block on that side as well to stop the drift in that direction. They do indeed get to the mat, and they get there pretty directly, but they end up with a stiff horse. They were riding for the goal (get to the mat), not the underlying reaction patterns that would get them to the mat with a quality ride.
When their horse gave them that first right turn, they didn't tell the horse that was right. They didn't reward that good response. Instead they blocked it because they got more right turn than they needed. The horse doesn't know the object is to get to the mat. He just knows he was asked to turn right which he did. He thought he was doing the right thing, but now that's being blocked and he's being sent back the other way. There's a good chance he may get so confused and frustrated that he shuts down. Or he'll get stiff to protect himself from the blocking actions of leg and rein.
Leslie showed a very different approach. Each correct response was acknowledged and reinforced. She would ask for a right hand turn, and when Charlotte responded, click and treat. Then it was which way do you need to turn to be headed toward the mat? Each correct response was reinforced. They were in no hurry to get to the mat and the result was a very pretty, very relaxed young horse - who got to the mat in good form.
Letting goals take over is so normal. Especially when there is a physical goal in sight, we tend to get grabby. I found myself doing this not to long ago. I was riding to a marker on the arena wall. Thirty feet, twenty feet, even ten feet out from the marker, I was being a good ride-for-response rider. But when I got into the tractor-beam proximity of the marker, all of a sudden I found myself grabbing hold of the rein! I know better and I was still letting the goal take over. We were so close! Just a little firm feel and we'd get there! But at what a cost. Goals can so trip us up and mess up training, mess up relationships. I caught myself grabbing the rein, knew what I was doing and rode to the next marker better. But the ride illustrated for me just how important this concept is and how mindful we need to be about managing our goals. We need to create goal-oriented tasks for ourselves so we stay tuned up in the skill of riding for reaction pattern. The goal is a reference point. It gives us a way of measuring progress, of drawing us forward so we don't stall out in one place with our horses, with our lives. But the goal should remain that - a reference point. It should not take over so getting to the goal becomes everything and how we get there is overlooked.
Phew! All that from a simple lesson of riding to a mat. If everything is everything else, nothing is ever as simple as it seems!
The lessons covered in Lesson 16: Whoa! Stop! form a great prep for the next lesson: Hip-Shoulder-Shoulder. The subtitle for that DVD is "Your Power Tool for Performance Excellence". That's a great description. Hip-Shoulder-Shoulder is a major safety lesson. It will keep you safe when the world suddenly erupts into chaos and your horse thinks he needs to erupt along with it. It is a major rebalancing tool so it is also a key component for advanced training.
32,00 €
Endpreis, zzgl. Versandkosten
- 0,15 kg
- verfügbar
- 5 - 8 Tage Lieferzeit

Lesson 17: Hip-Shoulder-Shoulder Your Power Tool for Performance Excellence
As the title suggests this is a power lesson. But don't let that scare you off. Hip-shoulder-shoulder (HSS) is a very basic leading and riding pattern. If you've been following the previous lessons in this series, you have already been using HSS. It's tied into the lateral flexions of three-flip-three. In it's simplest form it is the disengagement of the hindquarters that you've no doubt used to stop your horse when he's rushing forward. You've slid down your lead or rein and taken your horse's hip around. And then to make sure he really wasn't still barging forward, you followed this up by asking him to back up a couple of steps. That's a simple form of hip-shoulder-shoulder.
Or maybe you were asking for three-flip-three, but you got a little bit too much hip and your horse over-rotated and ended up backing up a step or two. Congratulations! You've just practiced the hip-shoulder-shoulder pattern. Or maybe you were working on the "Why Would You Leave Me?" circle of cones. Every time you changed direction using your food delivery, you were practicing the hip-shoulder-shoulder pattern. You set him up for the turn via a hip-shoulder-shoulder rotation. So whether you were aware of it or not, in all likelihood the hip-shoulder-shoulder pattern is one that your horse is already familiar with.
Lesson 17 begins by defining HSS. It includes a demo where I walk the pattern and show you how it evolves from a complete turn-a-round into a straight line pattern. You'll see examples of HSS so your eye becomes tuned to the pattern, and I review briefly examples of HSS from previous lessons to remind you of the links between these earlier lessons and the current one.
At this point in the lesson series I am assuming that you already have a solid understanding of the lead and rein mechanics. I don't cover that in this lesson. If you need help with your rope handling skills, I refer you back to previous lessons. In this DVD I want to cover new material. I know you can get HSS from your horse. It's already popping out of the previous exercises you've been using. The question is do you recognize what you've got? This lesson will definitely help with that. And do you know what to do with it once you've got it?
The DVD takes you through a series of lessons showing progressively more sophisticated uses for HSS. The first lesson features an Icelandic. I was going to write a perfectly charming Icelandic, but that seemed redundant. Every Icelandic I've met has been a charmer, and Freyr was certainly no exception. You've met Freyr's owner before. Nick Foot was on the "Overcoming Fear and the Power of Cues" DVD with another of his in-for-training Icelandics. Freyr was also in need of retraining. His previous owners had gotten him into a total muddle to the point where all he would do under saddle was back up. Riding was a completely poisoned cue as far as he was concerned.
In the DVD Freyr is being handled by Alison. Alison had spent some time working with Freyr before the clinic. The result were some very lovely "why would you leave me" lateral flexions. HSS was there to be had. I had Alison ask for a bit more hip as she turned around a cone, and there it was. The hind end swung around and set Freyr up perfectly for the backing steps.
So the basic hip-shoulder-shoulder pattern was in place. Everything on the ground looked good. Freyr was connected to Alison. He was relaxed, he was working well. It was time to get on. So Alison walked Freyr up to the mounting block. No problems there, except when she stepped up onto the mounting block, Freyr swung wide.
Ok, that just means we needed to review the "Capture the Saddle" mounting block lesson. Except there was more going on here. Remember the lesson about goals I just talked about from the previous DVD? It comes into play here. Alison and Cherrie Foot had already worked Freyr through the "Capture the Saddle" mounting block lesson prior to the clinic. He understood the lesson, and yet he was still swinging wide, not lining up his hips. He was very politely saying no thank you to what he knew was coming. He was delighted to work with Alison on the ground, but he wasn't ready to be ridden.
We need to listen to our horses when they say no. I've heard so many tales of woe that begin with "I should have known better. My horse was telling me he wasn't ready. I should have listened to him." Listening to our horses in this way is something that is actively discouraged by many riders and trainers. You'll be told to just get on and ride him through it. If you're a strong enough rider, with a solid enough seat, you may indeed be able to get through the road block, and you may even help the horse untangle a mass of confusion. But you may also encounter a back you can't stay with, a temper you can't ride, and a horse who needs to be listened to not shouted at.
So how did we listen to Freyr? We shifted the intent of the lesson and focused on using HSS to help unpoison the mounting block. If we could unpoison the mounting block, then we would be a step closer to unpoisoning the first few steps of riding. And if we could do that - well we'd be well on our way to showing Freyr that riding could actually be fun. I can't show you this entire process on the DVD. To have gotten this all on tape would have meant tracking Freyr's progress over a stretch of time, and I was only there for a couple of days. What is on tape however shows the way forward. Alison does a beautiful job handling Freyr, giving him lots of think time and working him in small enough increments so that he was able to let go of a huge layer of his concern.
Hip-Shoulder-Shoulder Refined
This first lesson shows a very simple, but very important application for HSS. We were working on emotional balance. The second lesson takes you another stair step deeper into the development of HSS. Here we're looking at physical balance. Again, we're working in hand, but this time with a horse that is much further along in her training. This is Chloe with her owner, Liz Lamb. When I met up with them last summer, Chloe had had a chunk of time off. Liz had bought a farm and had spent most of the spring putting up fencing and doing other necessary repairs. So the horses had had a bit of a vacation. In Chloe the time off showed up in her lateral flexions. She was leaning into her outside shoulder, and, as a result, she was rushing a bit to catch her balance. Our set-up was a familiar one by now, the cone circle with a mat at the center. There were two points of focus in this lesson. One was the quality of the HSS turn around the cone. And the other was the approach to the mat. Here the question was: could Liz insert a HSS half halt into the approach to the mat, or did Chloe run through her hand to get to the mat? (There's that concept of goals and reaction patterns coming into play again.)
This lesson illustrates how the basic HSS pattern evolves into half halts which we can then use to rebalance lateral work. Because Chloe was a bit rusty in her work, she was at the perfect place to illustrate this lesson. On the video you'll see that at times when she swung into her HSS resets, she inverted her back. The HSS at this point in the process still had a blocking effect. I want the horse to be able to maintain the roundness of its top line and not have that momentary stiffening. When they figure out this transition, HSS becomes a lesson of grace and not simply control This is where the horse enters into the pivot of the hip through the "Gene Kelly" glide.
The "Gene Kelly Glide"
The "Gene Kelly glide" is an expression I use to mark a particular feel in the HSS pattern that comes into play as the horse learns to melt into the movement. You won't feel it in the first HSS you ever ask for, or even in the fiftieth. It comes from playing with this exercise over a long enough stretch that you discover this layer of nuance.
I know over the years when I've referred to the "Gene Kelly glide" in clinics, it's been one of those in one ear and out the other expressions. Maybe people haven't watched "An American in Paris". I have to admit I haven't seen it in decades. If I saw it today, I might even wonder how in the world I ever came up with that connection! But there is a point in the famous "Singing in the Rain" dance sequence where Gene Kelly glides across the set with a draw back in his body that makes me think of hip-shoulder-shoulder. It is the feel you get from the transfer of energy when things are absolutely, wonderfully right.
You can walk the HSS pattern without a horse and feel the evolution of the "Gene Kelly glide", That's an important part of the learning process. It also helps to ride a horse that has it in his body, but that's not something I can provide via a DVD. Instead I have to settle for showing you a horse who is learning, or in the case of the video, relearning this pattern. Again, I am showing you a horse who has had a huge chunk of time off. As you watch the DVD, you may begin to wonder - doesn't anyone work their horses regularly? So many of the horses I'm using, including my own, are just being brought back into work after long stretches of time off. The reason for this is these horses are at a point in their training where things are rusty. In another couple of rides they'd be flowing through these lessons, and you wouldn't be able to see how things were formed. That doesn't help you when you're trying to learn, so I show you horses not at their best, but when they are rusty and in need of a tune up.
That is certainly the case of the next horse in the DVD. This is Fengur. Fengur is one of the Icelandics on the cover of the Step-By-Step book. He belongs to Ann Edie, Panda's owner. When this lesson was filmed in the fall of 2008, Fengur had had a huge chunk of time off. He suffers from sweet itch, a severe allergic reaction to insect bites. This had kept him off the riding roster for most of the summer. As a result, he'd gotten out of balance, especially in his tolt, so I was spending a couple of days schooling him for Ann, tuning up among other things his HSS. We'd had two good rides, then I was out of town for four days. When I came back, I gave him another training session, and this one we got on tape. Fengur was at a perfect place in the lesson to show the transition into the "Gene Kelly glide" form of HSS. On the video, I rode him for a bit, and then Hilary Cross from the UK rode him through the same HSS lesson. Hilary gave an excellent commentary on what she had to focus on as a rider to accompany Fengur through the HSS pattern.
Shoulder-In
Three horse, three good lessons. You'd think at this point that I'd be reaching the two hour limit of what can be squeezed onto a DVD, and you'd be right, but I wasn't done with the lesson. The DVD continues onto disc two. On this second disc, you meet Monty Gwynne and her very beautiful Spanish-bred Andalusian, Icaro (Icky for short). Again we were lucky in being able to video Icky at a point in his training where he was illustrating beautifully some key lessons. With Icky's rides you'll see how HSS develops from a simple redirection of energy for safety and control into the nuanced version that gives you balanced half halts.
Prior to the clinic Monty had been working on sending Icky forward. And, as so often happens, in focusing on one element in the training, she had not noticed that something else was getting out of balance. Icky was beginning to run through his balance resets. He was rushing his lateral work so it wasn't as pretty or secure a feel as Monty wanted. So it was back to HSS. I filmed each of Monty's training sessions over a four day period so you get to watch a wonderful progression in the work. We begin with a straight forward review of HSS. Can you get it? Can you get it consistently? From there we progress into lateral flexions and then into shoulder-in and haunches-in. What that means is we have come full circle. In Lesson 16: Whoa! Stop!, I had Hannah let go of her outside rein. In lesson 17, Monty reconnects with her outside rein, and you'll see how HSS is used to create balanced resets.
As beautiful as Icky is, he is only the understudy. The last lesson I focus on features Snowy, Monty's principle riding horse. Snowy shows you another stair step in with the work, showing off some very pretty ridden work. Snowy also illustrates another very important point about this work. She shows you that you don't have to have a "fancy" horse to access this type of riding. No matter what breed of horse you have, no matter their size or background, you can experience this feels-like-heaven type of riding.
Snowy brings us to the end of four hours of teaching. From Freyr who was just getting started in his training through the stair steps of the other horses you'll see how HSS becomes an increasingly nuanced and sophisticated exercise. You'll see how it evolves from a turn-around ricochet of energy as you disengage your horse's hips, into a straight-line, subtle reset of balance and energy. It's a wonderfully simple yet oh so complex pattern. Certainly for myself the more I explore it, the more good things I discover within it, and the more connections it creates to other layers in my training.
45,00 €
Endpreis, zzgl. Versandkosten
- 0,15 kg
- verfügbar
- 5 - 8 Tage Lieferzeit
Lesson 18: Loopy Training
Loopy Training is a teaching strategy. If you're familiar with clicker training at all, you probably have encountered the phrase: Behavior leads to click leads to reinforcement.
What we need to remember is this is not a single phrase but a loop:
Behavior leads to click leads to reinforcement leads to
more behavior leads to click leads to reinforcement leads to . . .
Good training can be structured as a series of loops. The mantra is: when a loop is clean you get to move on, and not only do you get to move on, you should move on.
So Loopy Training teaches you how to build complex chains and how to shift criteria so your learner continues to be successful. That's just the beginning. Good clicker training is Loopy.
I could have divided this single title up into three separate DVDs, but the lessons and concepts which are covered in this DVD belong together as a group, so I decided to put everything into a single three disc DVD title.
This is a long DVD. Think of it as though you were going off to a weekend conference. But instead of sitting in an uncomfortable chair in a large lecture hall, you get to watch the presentations in the comfort of your own house.
This is also a hard DVD to categorize. On the one hand the basic concept of loopy training makes a great starting point for exploring clicker training. The foundation lessons are best taught as loops. So if you are new to clicker training the Loopy Training DVD actually makes a good starting point. But many of the concepts and some of the later exercises may feel a bit overwhelming to someone starting out. If you are a beginner, my recommendation would be to get this DVD. Watch the first part, then go back to the beginning of the series and work your way systematically through the lessons. Periodically rewatch the Loopy Training DVD. Each time you do, you'll find that the later sections make more and more sense to you and you are ready to apply the concepts to your training.
If you've already been working your way through the DVD lesson series, you'll find that this DVD does many things for you. It gives you a great review of basics. And it will show you how to make your training much more structured and systematic. You'll understand more about the power of cues and how to chain of behaviors together. It will also show you how to teach not just individual behaviors to your horse, but advanced concepts, as well. This DVD will move your understanding of clicker training to a new level.
79,95 €
Endpreis, zzgl. Versandkosten
- 0,15 kg
- nur noch begrenzte Anzahl vorhanden
- 5 - 8 Tage Lieferzeit